

In the fast-paced world of digital marketing, a robust social media presence is non-negotiable for businesses. Not only does social media help businesses maintain a fresh online presence, it can also be used to attract new customers, build brand loyalty, and increase sales.
In today’s blog, we’ll explore the FREE tool that Meta Business Suite offers to help businesses like yours schedule social media posts on Facebook and Instagram.
Getting Started with Meta Business Suite
Account Setup
Setting up your Meta Business Suite account is the first step toward efficient post scheduling. If you don’t already have an account setup, please follow our checklist below.
- Visit business.facebook.com/overview and click “Create an Account”.
- Fill out your business information, including the business name, your name, and your business email.
- Click “Submit”.
- You’ll now need to add any assets you want associated with your Meta Business Manager. This includes your
- Facebook Page
- Instagram Page
- Meta Ads Account
- WhatsApp Account
- Meta Pixel
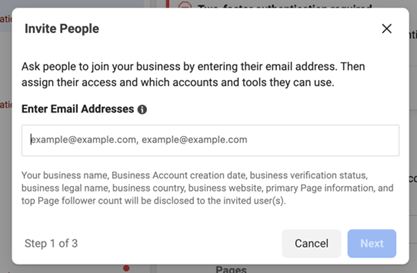
Once you’ve added your assets to Meta Business Manager, you can now add other people to help manage your accounts. Invite users to manage the page via the email that is associated with their Facebook account.
Creating Scheduled Posts
It’s important to make sure you craft content that will resonate with your target audience. We recommend using platforms like Canva, Adobe Photoshop, and other photo/video editing tools to create appealing content for your posts.
Once you’ve gathered your creative materials, whether it be a graphic or video, the next step is to get the post scheduled.
Scheduling A Post
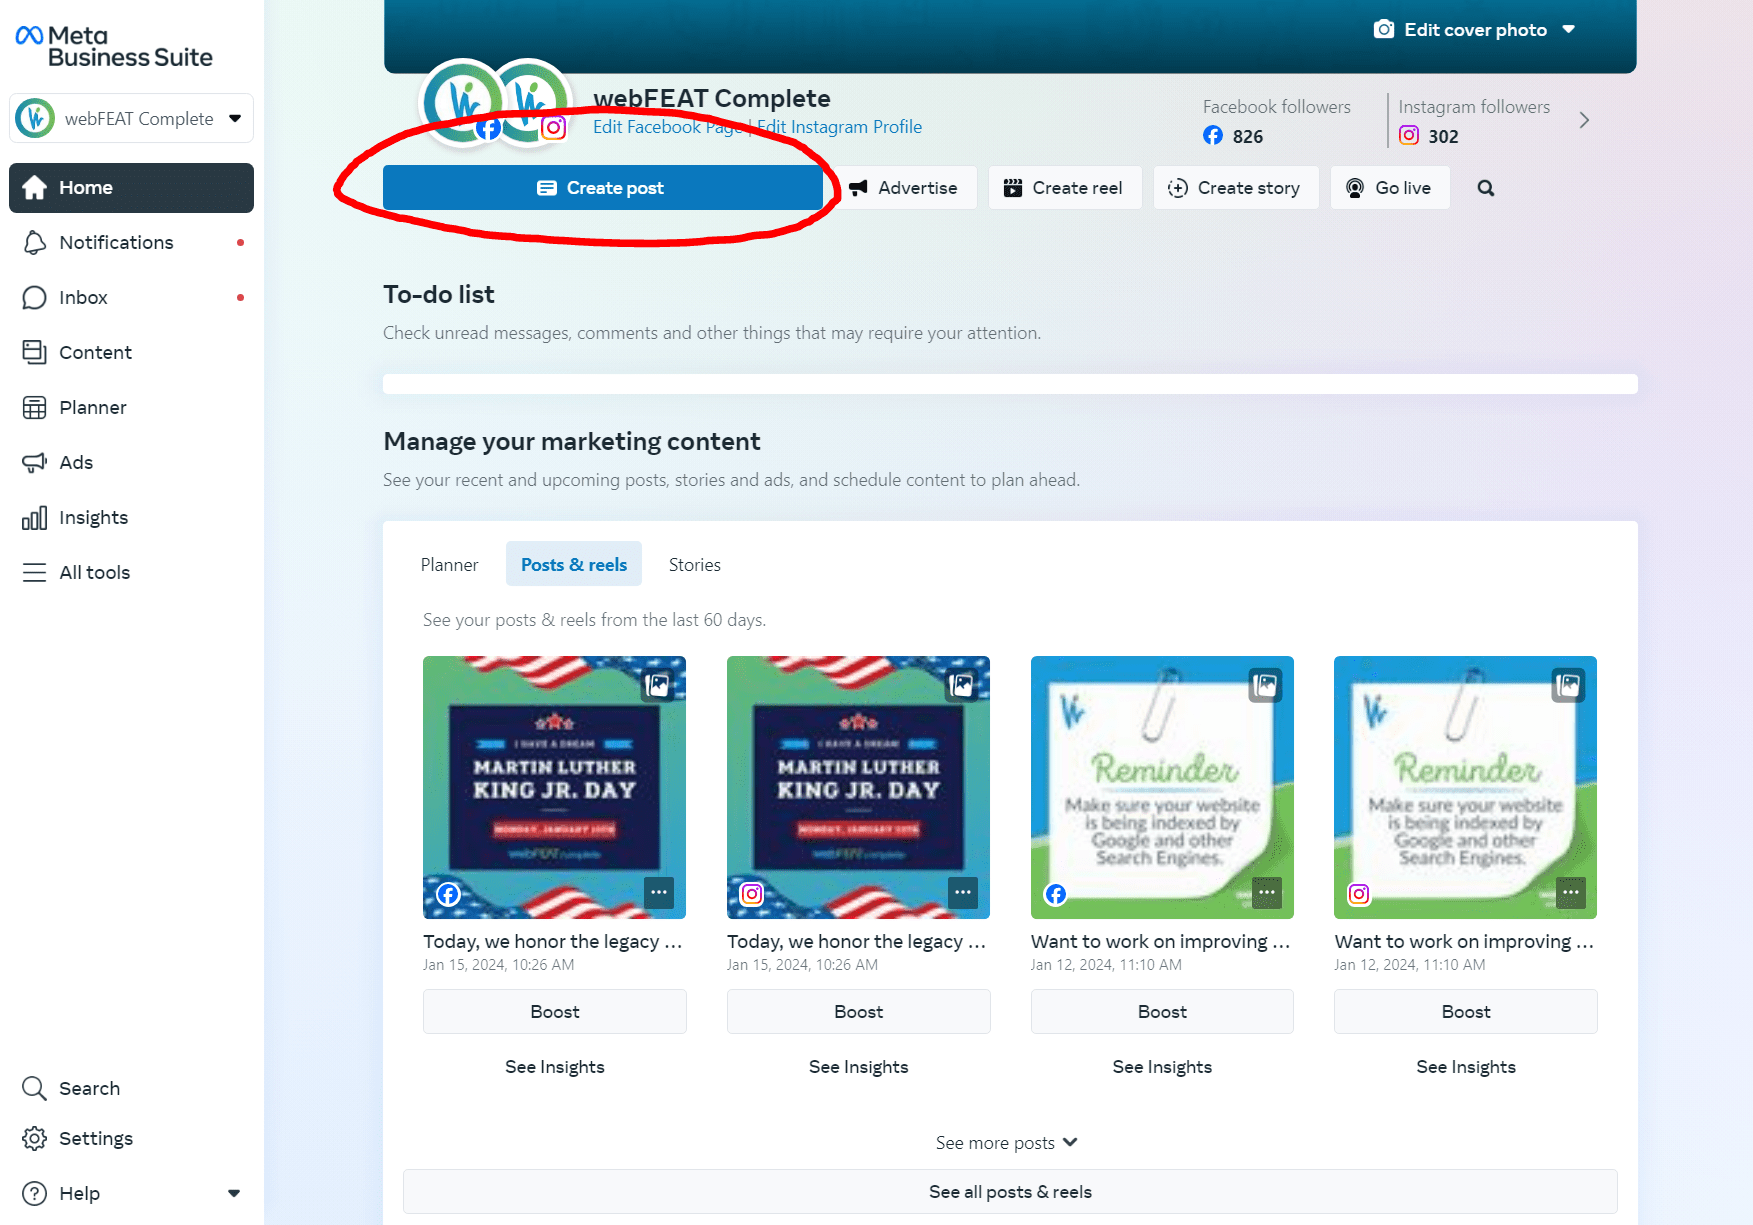
Step 1: Go to the Home Page in Meta Business Suite. From there, click on the “Create Post” button that you see towards the top center.
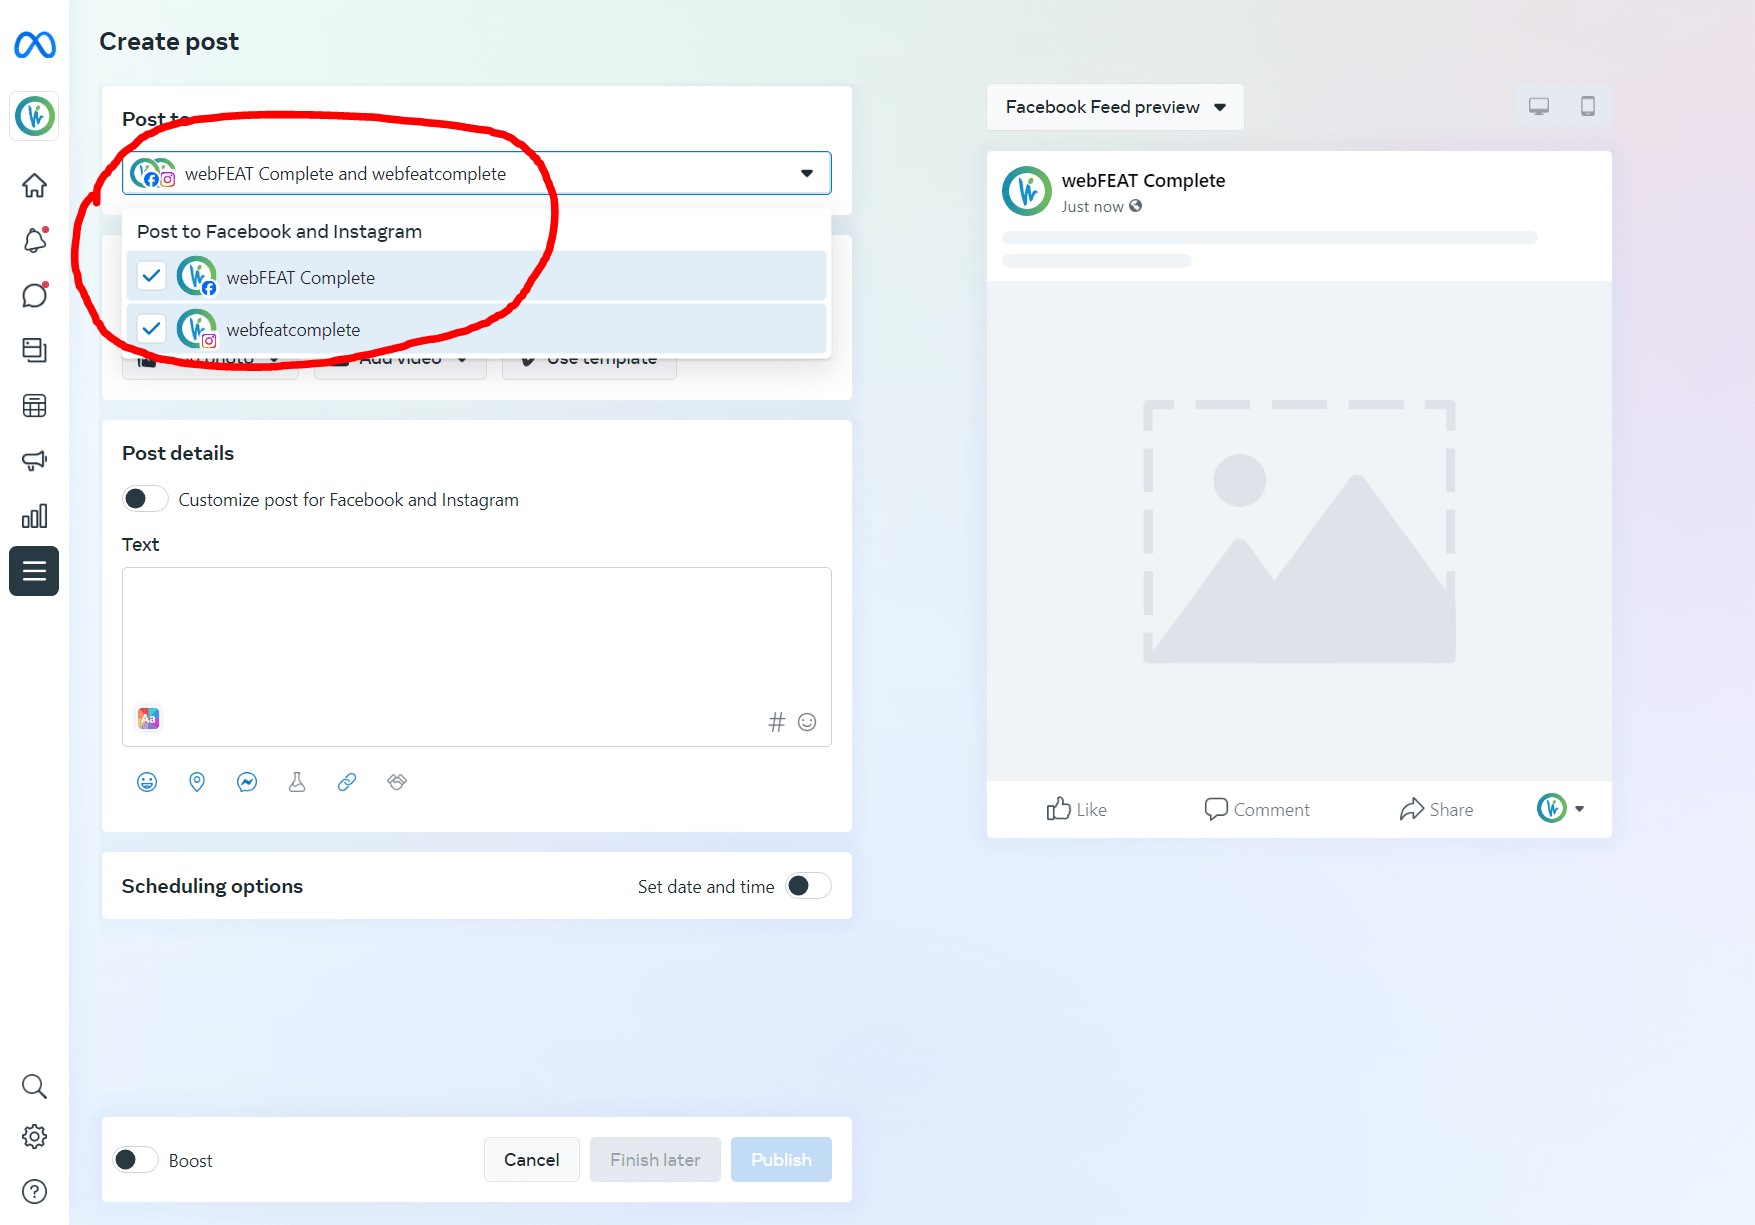
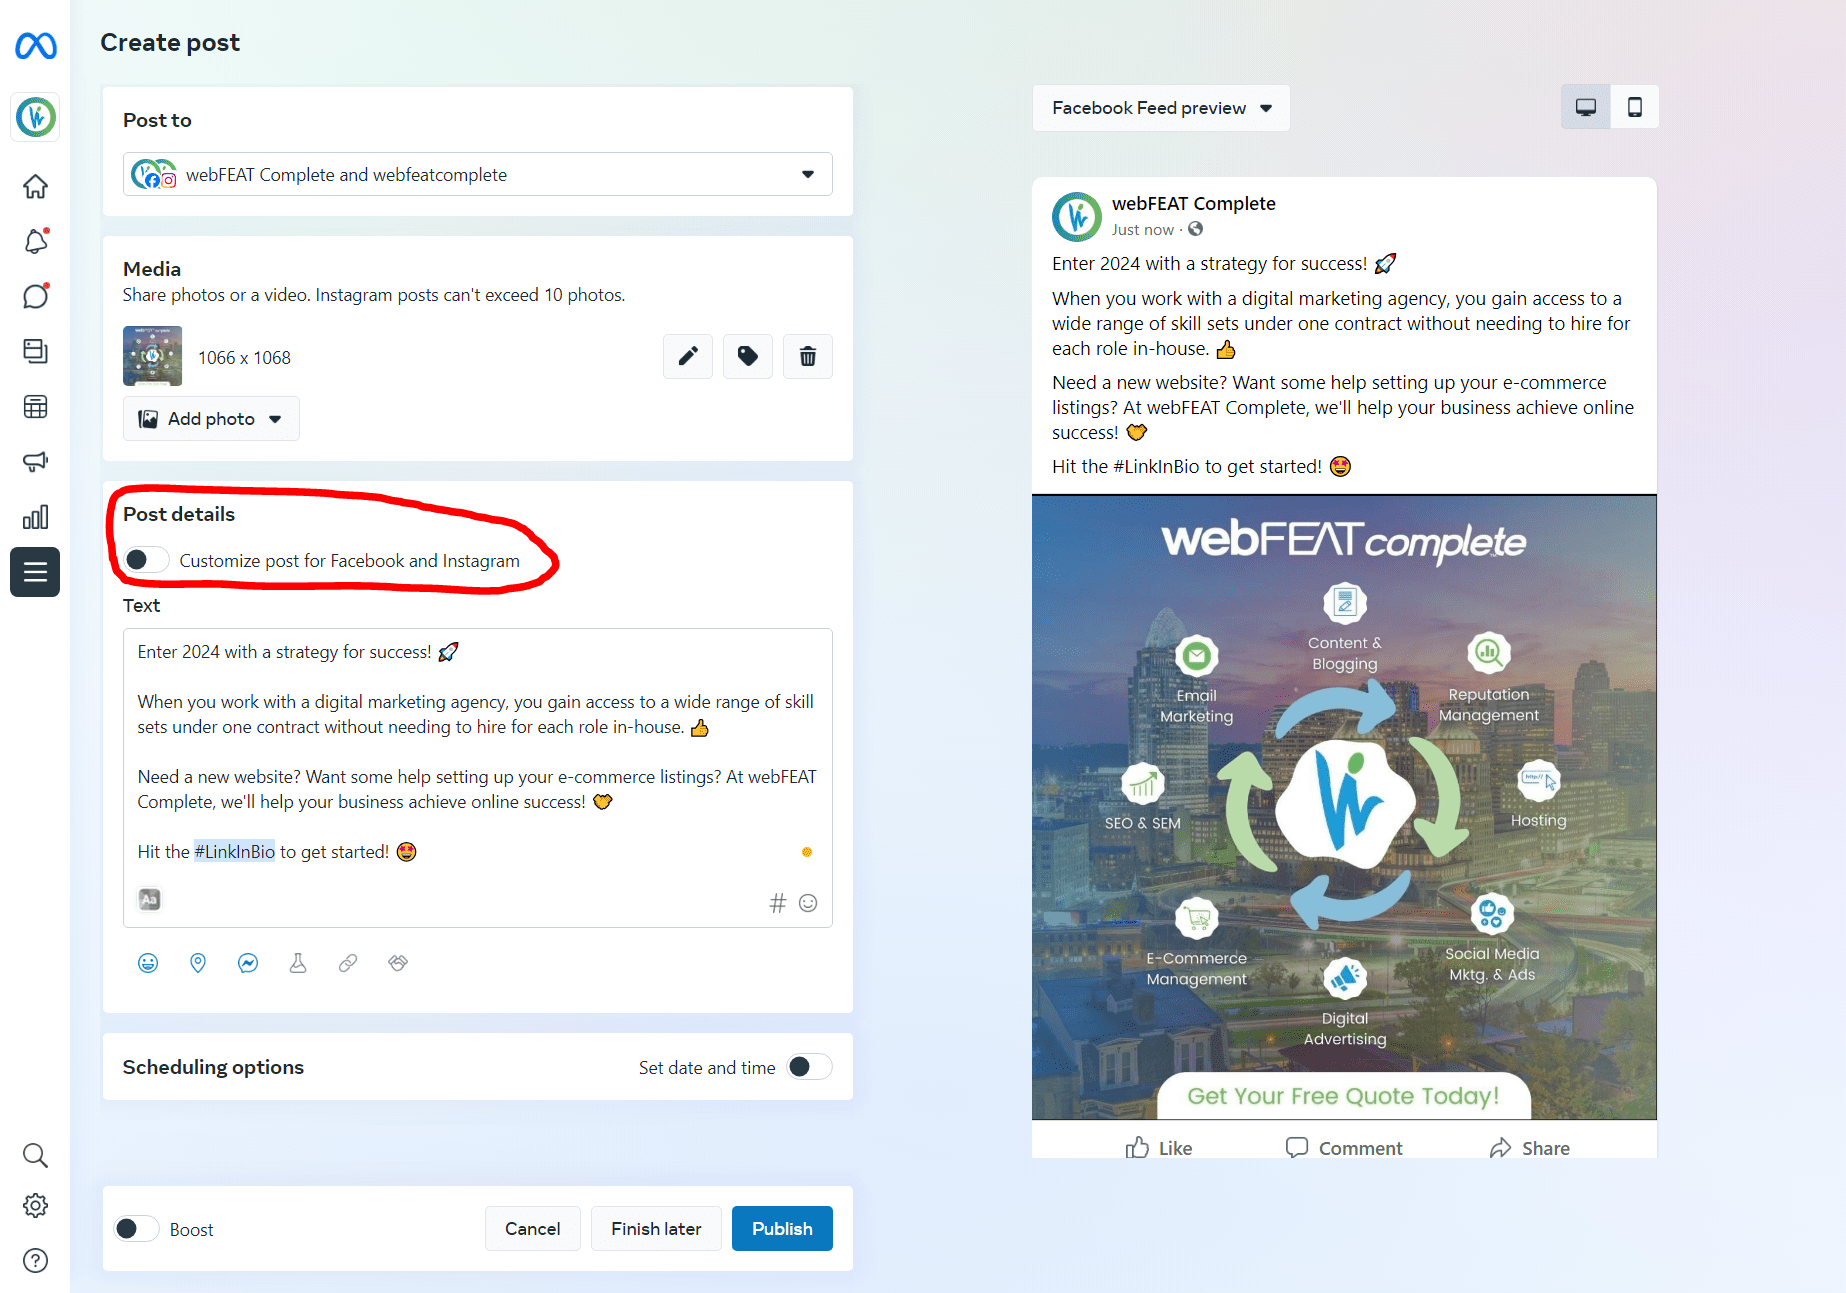
Step 2: Choose which platforms you’d like to post to.
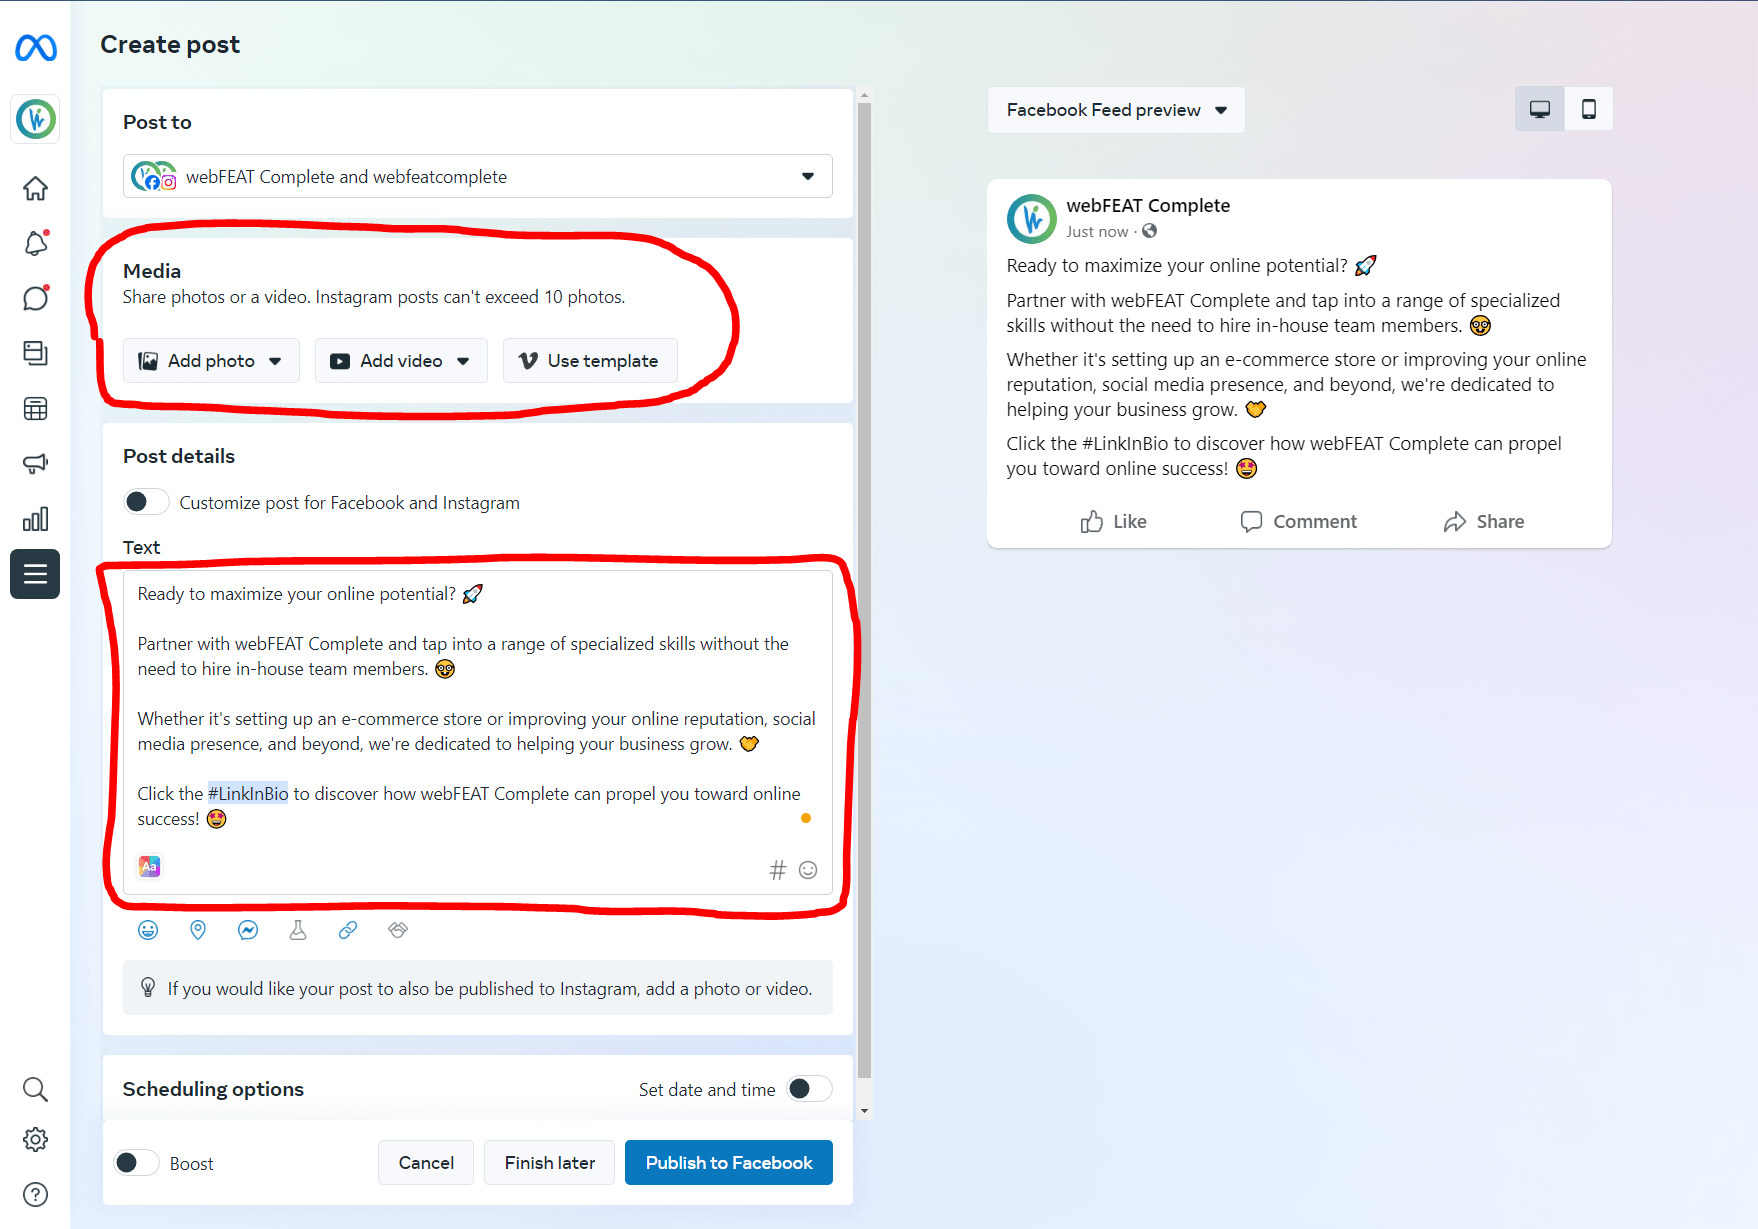
Step 3: Insert the media/content that you’d like to use.
Step 4: If you’d like to customize the post across Facebook and Instagram individually, click on the slider that reads “Customize post for Facebook and Instagram”.
Step 5: Once the post is ready to go, the next step is to get it scheduled. Locate the “Scheduling Options” section at the bottom of the screen and click on the “Set date and time” slider. From there, select a time that you’d like the post to be published.
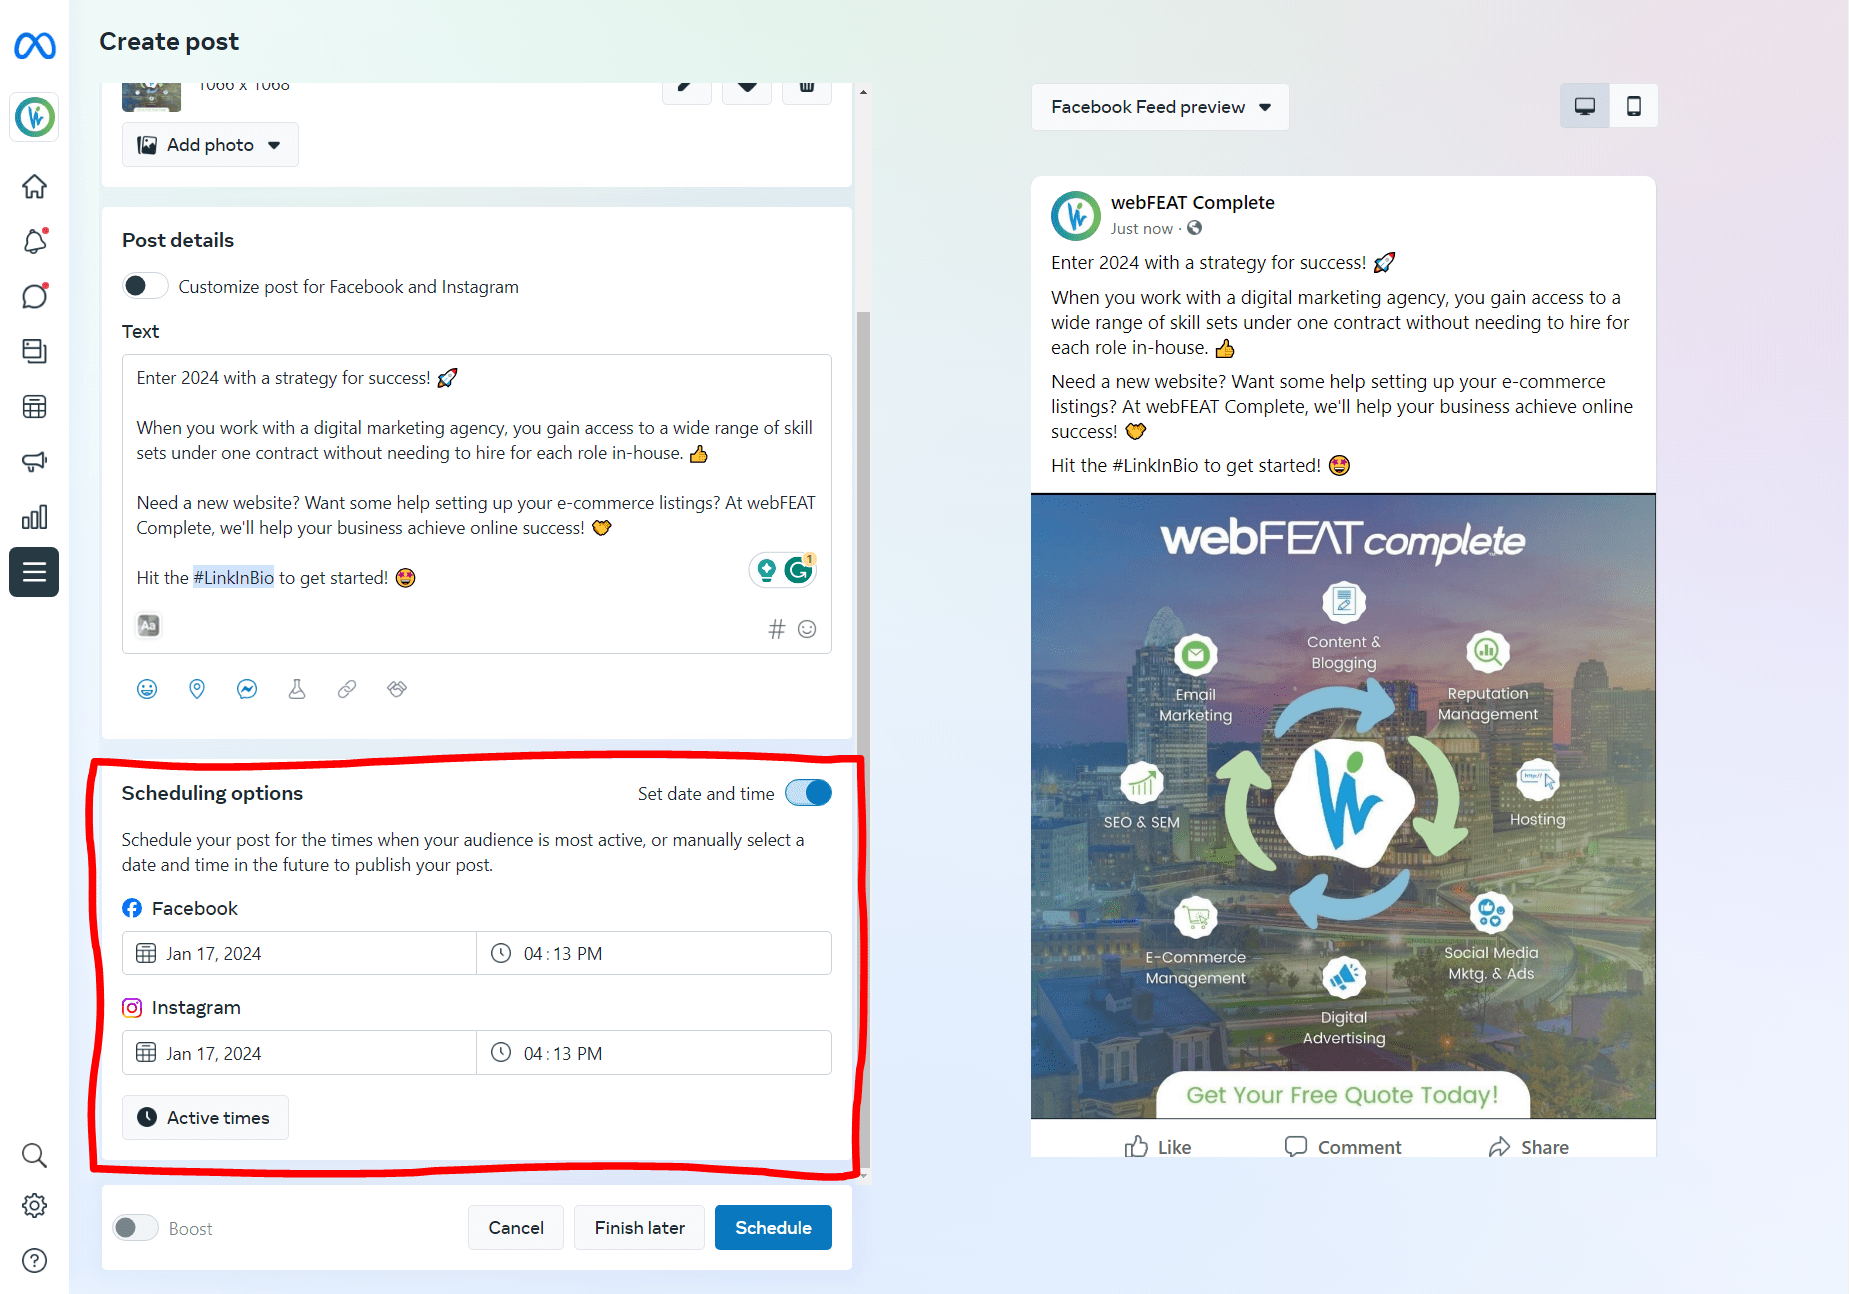
Bonus Step: If you want to see what time your audience is most active, click on “Active Times” at the bottom of the “Scheduling Options” tool.
Step 6: Once you’ve selected a time, click on “Schedule” at the bottom of the page to schedule the post.
Editing A Post
Step 1: We get it – accidents happen. If you’re looking to edit your social media post, start out by heading to the “Content” section located in the navigation on the left-hand side of the screen.
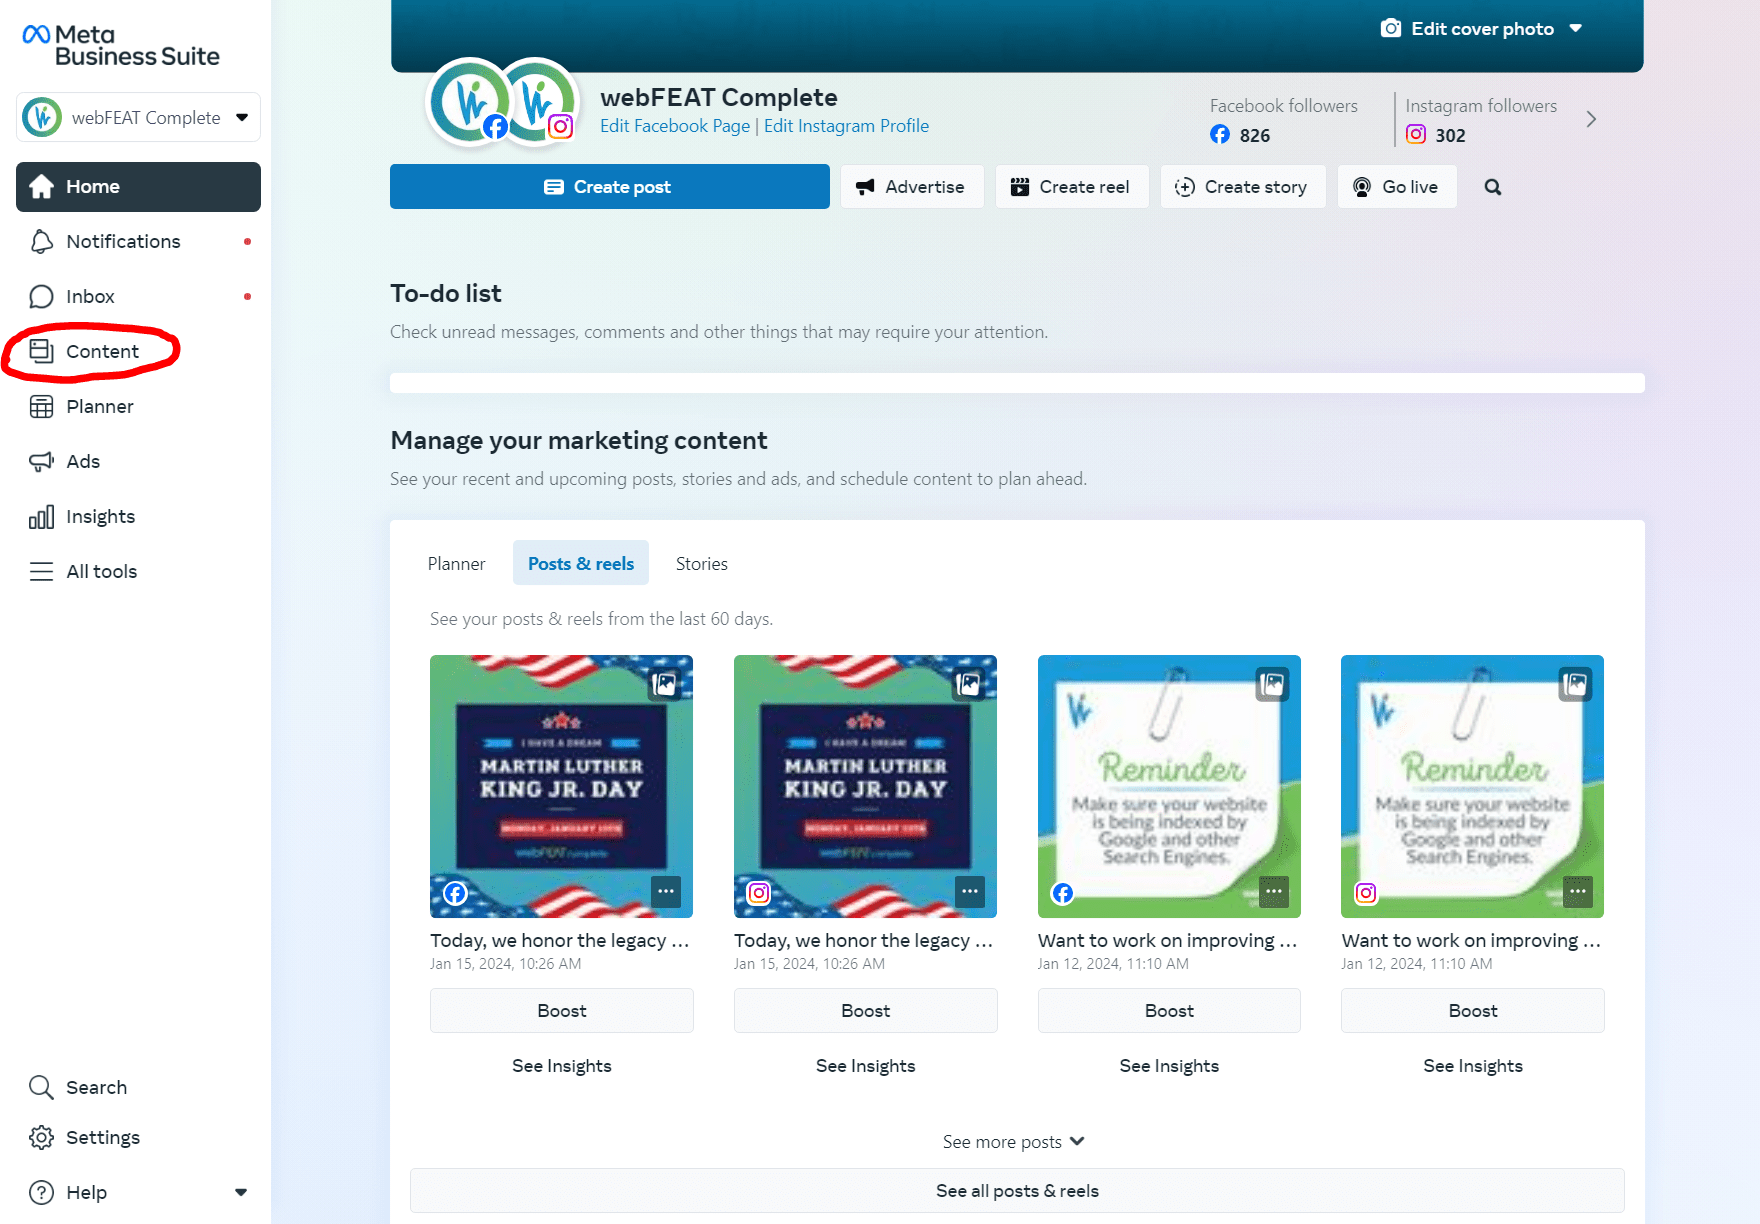
Step 2: From there, find the post that you want to edit and click on the 3 dots “…”, then select “Edit Post”.

Step 3: Make your desired edits, then click “Publish” at the bottom of the page.
Deleting A Post
If you want to delete a post through Meta Business Suite, the steps will be similar to the ones you followed when making an Edit. Start out by heading to the “Content” tab, then find the post that you want to delete. Click on the 3 dots “…”, then select “Delete Post”.
Social Media Best Practices
We’ve put together a list of best practices to follow when posting on social media so that you can get the most out of your efforts:
1. Consistency is key
Maintaining a consistent posting schedule is not just about frequency; it’s about reliability. Your audience should come to expect and look forward to your content at specific times. Develop a content calendar and stick to it, ensuring a steady flow of engaging posts.
If you’re struggling to find the best time to post, refer to the “Active Times” section at the bottom of Meta’s social media scheduling tool.
2. Engage with your audience
Social media is a two-way street. Beyond posting, it’s important to make sure you are actively engaging with your audience. Respond to comments, answer questions, and acknowledge feedback. This interaction not only builds a sense of community, but also enhances your brands credibility.
3. Optimize content for each platform
While Meta Business Suite allows you to manage both Facebook and Instagram from one place, it’s crucial to tailor your content for each platform. Understand the nuances of your audience on each channel and optimize your posts accordingly.
4. Use hashtags strategically
Hashtags are a powerful tool used to increase the visibility of your posts. Research relevant and trending hashtags in your industry and incorporate them into the caption or comments section of your posts.
Conclusion
Meta Business Suite presents itself as a great solution for businesses who are navigating the complexities of social media scheduling. Streamlining your strategy through Meta’s social media scheduling tool not only enhances efficiency, but also unlocks new opportunities for your business.
Don’t Have Enough Time To Learn Social Media? Let webFEAT Complete Take Over!
If you need a kickstart on your social media journey, contact webFEAT Complete today! With over 24 years of digital marketing expertise, our team has successfully guided numerous businesses, similar to yours, towards greater success through social media marketing. We look forward to hearing from you!